Getting into plantbased snacking can really help with staying on track for healthier eating.
Coming home to readytograb bites like crisp veggie sticks, homemade hummus, or roasted chickpeas means you’re way less tempted to reach for processed snacks.
If you’re like me and want to make plantbased snacks part of your daily routine, having a solid prep plan makes a big difference.
Why Prep PlantBased Snacks?
The popularity of plantbased eating has exploded, and solid data backs this up.
According to Statista, the plantbased food market in the U.S. is growing quickly, with more people swapping animalbased products for plant alternatives.
With busier schedules, it’s not always easy to put together healthy snacks on the fly.
That’s where a weekly snack prep plan is super useful.
Making time for snack prepping means I always have something nutritious within arm’s reach.
When I started prepping snacks every Sunday, I noticed right away that I stuck to my healthy eating habits way more.
Plus, prepping takes the guesswork out of daily choices and helps reduce food waste.
It’s also nice to save money skipping all the individually packaged storebought snacks.
Prepping PlantBased Snacks: My GoTo Methods
Plantbased snacks cover a huge range, from crunchy veggies and dips to sweet fruit medleys and roasted legumes.
What I really like is that prepping just a few basics can keep my snacks fresh and fun all week.
Here’s what my typical snack prep routine looks like:
- Washing and Slicing Vegetables: Prepping carrots, cucumbers, celery, and bell peppers into sticks or coins for dipping or snacking solo.
- Portioning Fruit: Slicing apples, strawberries, and oranges for easy snacking. Tossing them with a bit of lemon juice keeps them from browning.
- BatchMaking Dips: Whipping up a batch of hummus or black bean dip to go with those veggies.
- Roasting Legumes: Roasting chickpeas or edamame with my favorite spices for a crunchy, proteinrich option.
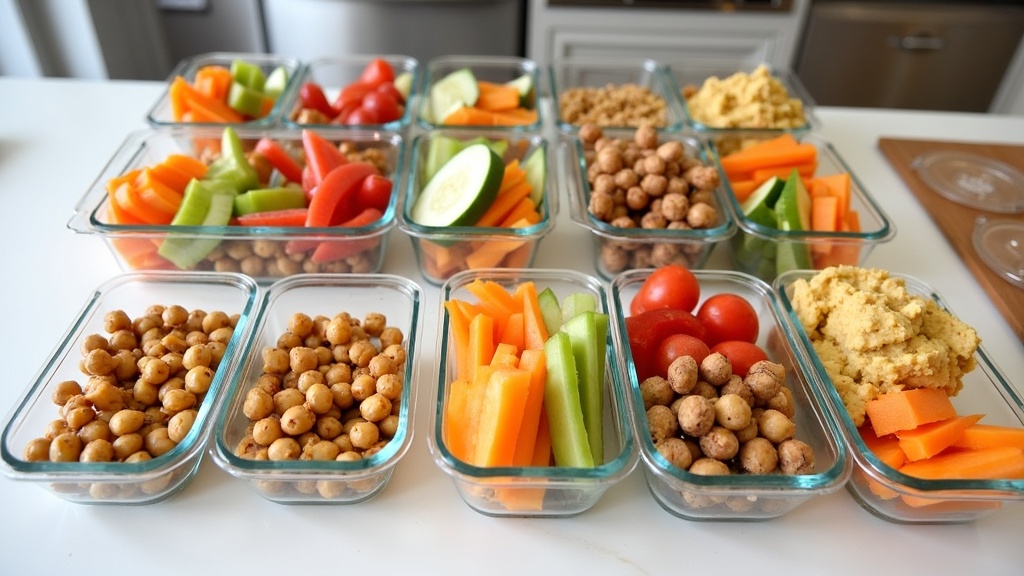
- Assembling Snack Boxes: Separating everything into containers or jars makes grabandgo snacking way more convenient.
Mixing and matching these options keeps things interesting, so I never get bored with the same old snacks.
It’s all about having enough variety to enjoy flavors and textures all week.
Your PlantBased Snack Prep ToDo List
Breaking down snack prep into a simple checklist helps me cover all my bases.
Here’s my triedandtrue plantbased snack prep todo list:
- Choose Your Snacks: Decide what you want for the week; veggies, fruits, dips, roasted nuts or seeds, and whole grain crackers.
- Shop and Stock Up: Make a list of fresh produce, beans, lentils, and pantry staples. Check what’s already on hand to avoid duplicates.
- Wash and Dry Produce: Clean all veggies and fruit before slicing. Let everything dry fully to keep it crisp longer.
- Slice and Store: Chop veggies and fruit, separating juicy items to keep things fresh.
- Prepare Dips and Spreads: Blend up hummus or whip together nutbased cheese, storing them in small containers.
- Roast and Season Legumes: Drain, pat dry, season, and roast chickpeas, edamame, or lentils.
- Divide into Portions: Use small containers or bento boxes to portion out singleserve snacks.
- Label and Date: Keeping track of what’s in each container helps avoid waste and stay organized.
- Store for Freshness: Stack containers in the fridge, with the oldest in front to remind me to eat them first.
Having this checklist stuck to my fridge is a great reminder and makes snack prep way less overwhelming, especially if you’re new to it.
Common PlantBased Snack Prep Challenges (And How I Solve Them)
Prepping plantbased snacks can hit a few snags, especially in the beginning.
Here are some issues I’ve run into and what works for me:
- Keeping Produce Crisp: Moisture is the enemy. I line containers with paper towels and separate juicy fruits from dry veggies, which stops everything from going soggy.
- Avoiding Boredom: Mixing up spices, herbs, or dipping sauces keeps my snack routine tasty. Even a sprinkle of smoked paprika or a new salsa can do wonders.
- Short Shelf Life: Prepping every 3 or 4 days instead of a full week helps. Some snacks, like roasted chickpeas, are better made midweek for crunchiness.
- Getting Enough Protein: Nuts, roasted legume snacks, and nut butter packets fill in the gaps. I keep a few shelfstable options in my bag or desk drawer.
Freshness Tips
Prepping doesn’t help much if my snacks wilt or go bad too soon.
Airtight containers and separating highmoisture foods go a long way.
Citrus juice works as a natural preservative for cut fruit.
I also keep small snacksized ice packs handy if I’m taking snacks on the go in warm weather.
Mixing Up Flavors
Changing which herbs or spice blends I use prevents snack fatigue.
One week I’ll make a roasted curry chickpea batch, while another week I’ll try cinnamon and maple syrup.
There’s no shortage of options—looking online for ideas is always helpful, too.
Protein Boosting Strategies
Adding sunflower seeds, almonds, or even seasoned tofu cubes makes the snack mix more filling.
Pairing carbs, protein, and fats (like hummus with whole grain pita or veggies with peanut butter) helps keep hunger at bay until the next meal.
My Favorite PlantBased Snack Combinations
Combining a few homemade snacks creates little meal moments throughout the day.
Here are a few of my favorite combos:
- Veggie Sticks + Hummus
- Sliced Apples + Almond Butter
- Roasted Chickpeas + Grape Tomatoes
- Rice Cakes + Guacamole
- Fruit Salad + Pumpkin Seeds
- Homemade Trail Mix: Dried cranberries, walnuts, dark chocolate chips, and pumpkin seeds
Swapping ingredients usually works well.
For example, swapping carrots for snap peas or apples for pears keeps things fresh when certain items are out of season.
Try mixing in different nuts and dried fruits each week to create your own unique trail mix.
If you want something on the sweet side, energy balls made from oats, shredded coconut, dates, and a dash of cocoa powder make for quick, satisfying snacks. You can roll them in chia seeds or crushed nuts for even more texture.
These no-bake treats are easy to store in the fridge and grab on your way out the door.
PlantBased Snack Prep in Real Life: Examples and Benefits
Taking snack prep beyond the kitchen can make a busy day so much smoother.
On workdays, packing snack boxes the night before prevents me from getting hangry midafternoon.
On hikes, I’ll toss a container of roasted edamame and dried fruit in my pack. They’re lightweight and keep energy up.
Parents I know who meal prep snacks say kids are much more likely to reach for healthy options if they’re already washed and cut.
It’s the same idea for adults; grabbing a bright container of prepped produce or a mini container of dip beats hunting for something last minute.
Choosing plantbased snacks over highly processed packaged foods can help support better digestion, more energy, and even better focus throughout the day.
A recent review also connects plantrich snacking to improved longterm health through fiber, vitamins, and antioxidants.
Having fresh snacks on hand means fewer trips to the vending machine and less spending on lastminute takeout.
Weekly Snack Prep Supplies for Beginners
Stocking the right supplies up front keeps snack prep easy and quick.
Here’s what I always have handy:
- Cutting board and sharp knife
- Colander/strainer for washing
- Airtight food containers (various sizes)
- Snack bags or jars
- Measuring spoons/cups (for batch recipes)
- Pan or baking sheet for roasting
- Blender or food processor for dips
Glass containers are a top pick for me since they keep food tasting fresh much longer than plastic.
They’re also better for reheating or quick assembly if I’m running late.
Ecofriendly beeswax wraps and reusable snack bags are also great options for storing single portions while reducing kitchen waste.
Frequently Asked Questions
Dropping a few of the questions I get most:
Question: How long do prepped plantbased snacks stay fresh?
Answer:
Most cut veggies, fruit, and dips are good for three to five days in the fridge, especially if they’re dry and sealed tightly.
Roasted stuff like chickpeas should be gobbled up within two or three days for best crunch.
Question: Are storebought snacks just as healthy?
Answer:
Some are, but prepped athome snacks let you control salt, sugar, and avoid additives.
Storebought options can work when you’re in a crunch, just aim for those with short, natural ingredient lists.
Question: Is it expensive to prep plantbased snacks?
Answer:
Not really.
Most ingredients (beans, produce, grains) are affordable when bought in bulk, and prepping your own saves a lot compared to individually packaged snacks.
Question: I’m short on time. Any quick snack prep tips?
Answer:
Precut vegetables or prewashed salad mixes can save time.
Use frozen fruit to throw together parfaits or smoothies.
Make a big batch of dip and portion it throughout the week to avoid daily mess and clean up.
Setting aside just 30 minutes twice a week can be enough to keep your snack stash stocked and fresh.
Getting Started with Weekly Snack Prep
Building a plantbased snack prep habit isn’t about chasing perfection.
It’s about finding a simple routine that fits your schedule and makes healthy eating a little easier.
A few hours on the weekend or a couple of times midweek gets me set up for better snacking.
Once it’s part of your routine, you won’t want to go back.
Having snacks ready to go means more energy, less stress, and a steady supply of tasty, feelgood bites all week long.
The little effort you put in up front pays off with convenience, savings, and a seriously tasty upgrade to your daily routine.